I love getting organized. I love putting my things in places where they belong and where I can find them. With an in-home art studio, I have a lot of “stuff” to put away day after day. Balancing that with family stuff (menu planning, grocery shopping, school activities, family outings, etc.) can be challenging so I came up with a few ways to help myself keep it all together. These four projects are DIY fun with Multi-Surface paints and Decou-Page from DecoArt. This morning I shared them on the FOX31 Denver morning news and it was super inspiring. I love when I can share tips that might support other people with busy and creative lives. This post is sponsored by DecoArt but the ideas and opinions are my own.

Okay, let make the first project. I created this painted and personalized wooden crate/box as a place to store my planner supplies. I work in it every single day and sometimes like to take it to the kitchen table. This is a place that I can put my favorite supplies and take them around with me.

Steps:
- Paint wooden crate with Multi-Surface paint. I used Black Tie.
- Cut you letters or words out of magazines to decorate the painted surface.
- When the paint it totally dry, use Decou-Page to add magazine clippings. If you don’t know how to use Deco-Pauge, you can get directions in this earlier post where I shared the directions to make a mixed media flower pot. The techniques are the same here.
- Let it dry and put it to use.
Let’s make a clipboard now. Follow the same directions above.

If you want the meal planner printable, you can grab it and download it free. It is a great way to keep the menu changing while being organized and prepared.

Next up, let’s make the bulletin board.

Steps:
- Paint the entire surface of a 12 x 12 cork square with Multi- Surface paints. I used the Black Tie again. I think I just love black!
- Let the paint dry completely. You can add stripes, dots or designs with different colors of paint. Meagan did on the news this morning!
- Glue the cork square to another one to make a thicker board. I used hot glue.
- If you want to add the ribbon, use hot glue to adhere it to the cork board. I used ribbon to create a loop for hanging it up.
We have tickets and gift cards to so many things at one time. I made these darling little magnetic clips to keep them in one place that is easily accessible. Whether you put them on your refrigerator or a magnet board, this is a great way to keep the fun options for going out in a visible place.

Steps:
- Put the wooden clips on the fold of a piece of paper.
- Paint the clips on all sides. Having them on the paper helps make this easier. You guessed it, I used Black Tie again.
- Add dots. I used Cotton Ball white. To make the little dots, I dipped the non-brush end of the paintbrush into the paint and dotted it onto the clips.
- Use hot glue to add magnets to the finished clips and ta-da. You have darling clips for putting up all the things on your refrigerator.
Here are a few shots from the FOX 31 Denver segment this morning.


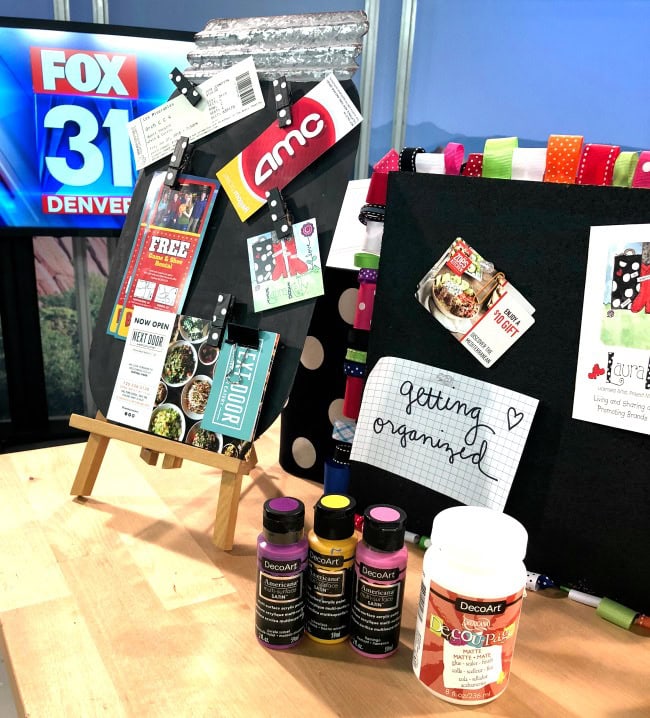


If you want to watch the news segment, here it is!
Cheers to DIY and Getting Organized!
Laura